
Run this: nmap -sV -sC -T4 TARGET. It combines version detection, default script scanning, and a faster timing template, giving you real, actionable information without overwhelming your target or your terminal. This is the single best starting point for anyone new to network scanning. One condition applies before you type it: only scan hosts you own or have explicit written permission to test.
TL;DR:
- Most beginners should start with
nmap -sV -sC -T4and only scan hosts they own or have explicit permission to test.- Running scans with
sudoenables faster, stealthier SYN scans, while without privileges, only slower connect scans are possible.- Ports marked as filtered usually indicate firewalls blocking the scan, preventing definitive open or closed state detection.
- Focus on understanding four port states: open, closed, filtered, and unfiltered, before exploring advanced scan types or scripts.
- Consistently save scan outputs with
-oAto build a reliable record for comparison and deeper analysis over time.
Table of Contents
- Nmap Tutorial Basics: Installing Nmap and Choosing a Target
- How Do You Run Your First Nmap Scan?
- What Do Open, Closed, and Filtered Mean in Nmap?
- Which Nmap Scan Type Should Beginners Use?
- How to Stay Legal While Practicing With Nmap
- An Instructor-Tested Path From First Scan to Confident Scanning
- Why Most Beginner Nmap Guides Overcomplicate the First Step
- Get Hands-On Nmap Training That Goes Beyond a Tutorial
- Where to Verify Nmap Commands and Syntax
- Sources
- FAQ
Nmap Tutorial Basics: Installing Nmap and Choosing a Target
Before running any scan, confirm Nmap is already on your machine by typing nmap --version. Most Linux distributions ship it or make it a one-line install; macOS users can grab it through Homebrew with brew install nmap; Windows users download the installer directly from the official Nmap project. None of this takes more than a few minutes.
Privilege level changes what Nmap can actually do. Running it with sudo on Linux or macOS unlocks raw-packet scan types like SYN scanning, while an unprivileged session falls back to slower, more visible TCP connect scans. Both work for learning, but the difference matters once you start comparing scan speed and stealth.
For practice, stick to targets that will not get you in trouble:
- localhost (
127.0.0.1) to see how your own machine responds - A private LAN device you own, like a router or home server
- scanme.nmap.org, a host the Nmap project maintains specifically for public testing
Before scanning a home network, it helps to understand what’s actually running on it. An online guide to networking for cybersecurity covers the fundamentals worth knowing first. And when it comes to downloading Nmap itself, stick to the official source. Grabbing tools from the wrong place is a common way beginners compromise their own systems before they ever run a scan.
How Do You Run Your First Nmap Scan?
A plain nmap TARGET command checks the top 1,000 most common TCP ports on the target and reports back which ones respond. That’s useful, but it tells you almost nothing about what’s actually running on those ports.
Work through these steps in order:
- Run the default scan first.
nmap scanme.nmap.orggets you a baseline: a list of open ports with generic service guesses. - Upgrade to the recommended starter command.
nmap -sV -sC -T4 TARGETadds three things at once:-sVfingerprints service versions,-sCruns Nmap’s default set of NSE scripts for extra reconnaissance, and-T4speeds up timing without triggering the kind of aggressive behavior that can crash fragile devices. - Add practical modifiers as needed. Use
-vfor verbose output while a scan runs,--opento hide closed and filtered ports from the results,-Pnto skip host discovery when a target blocks ping requests, and-por--top-portsto control exactly which ports get checked. - Save every scan you run.
nmap -sV -sC -T4 -oA myscan TARGETwrites the results in three formats at once, normal text, XML, and grepable, which matters more than it sounds like it should once you’re trying to compare results across sessions or feed output into another tool.
Saving output isn’t a nice extra. It’s the difference between a one-off scan and a record you can actually build on.
What Do Open, Closed, and Filtered Mean in Nmap?
Every scan comes back with a table listing port, state, and service. The state column is where most beginners get confused first, so it’s worth learning the vocabulary properly.
- Open means an application is actively accepting connections on that port.
- Closed means the port is reachable but nothing is listening.
- Filtered means a firewall, router, or other filtering device is blocking Nmap from telling whether the port is open or closed.
- Unfiltered means the port is accessible but Nmap still can’t determine its exact state.
- Combined states like
open|filteredshow up when Nmap gets no response at all and can’t rule out either possibility.
Pro Tip: A filtered port isn’t a failure. It usually means a firewall is doing its job. Don’t assume the scan is broken just because a port refuses to give you a clean answer.
These states come straight from Nmap’s own reference documentation, and getting comfortable with the distinctions early saves a lot of confusion later. Version and OS detection results are hints, not certainties. A service banner can be spoofed or outdated, so treat -sV output as a starting point for investigation rather than a final verdict. Once you find an open port running something unexpected, the next move is straightforward: check the service configuration locally, confirm whether it should be exposed at all, and decide if a deeper, targeted scan is worth running against it.
Which Nmap Scan Type Should Beginners Use?
Nmap offers several scan techniques, and picking the right one comes down to privilege level, target type, and how much time you’re willing to spend.
- SYN scan (
-sS) requires elevated privileges and works by sending a partial connection request without ever completing the handshake, which makes it faster and less visible in target logs. - Connect scan (
-sT) is what you get withoutsudo. It completes full TCP connections, which is slower and shows up clearly in logging systems, but it works fine for learning. - UDP scans (
-sU) take considerably longer than TCP scans because of how UDP handles non-responses. Narrow the scope with--top-portsinstead of scanning all 65,535 ports. - Host discovery (
-sn) checks which hosts are alive without port-scanning them, while-Pnskips discovery entirely and assumes the host is up, useful against targets that silently drop ping requests.
Pro Tip: Start with -sC, Nmap’s built-in default script set, before reaching for individually targeted NSE scripts. The default scripts are chosen to be safe and informative; some of the more specialized scripts are noisy or aggressive enough to disrupt a live service.
How to Stay Legal While Practicing With Nmap
Nmap is a legitimate diagnostic tool, but running it against systems you don’t control can violate computer misuse laws even if you never touch or damage anything. The official Nmap documentation addresses this directly and warns users to stick to authorized targets.
- Scan only hosts you own or have written permission to test.
- Define scope explicitly before you start: which hosts, which ports, which time window.
- Default to
-T4rather than-T5in shared or production environments; the more aggressive timing template increases the odds of tripping alarms or overloading fragile devices. - If you’re testing on someone else’s network, put the permission in writing and tell the relevant stakeholders before you begin, not after something breaks.
An Instructor-Tested Path From First Scan to Confident Scanning
Some instructors walk students through the same sequence every time, because it works: install Nmap, scan localhost, move to a private LAN subnet, add -sV and -sC, then start saving every output with -oA.
The two mistakes that trip up almost every beginner are privilege confusion (forgetting that some scan types silently require sudo) and misreading filtered as a scan failure instead of a firewall doing exactly what it’s supposed to do. Both resolve quickly once you know what to look for.
- Always run
nmap --versionfirst to confirm you’re working with a current build. - Annotate every saved scan with the command you used and the target you ran it against. Six months from now, an unlabeled scan file is nearly useless.
- Pair Nmap results with packet-level verification when something looks off. Total Cyber Academy’s Wireshark basics guide is a natural next step for confirming what a scan is actually reporting.
Why Most Beginner Nmap Guides Overcomplicate the First Step
The biggest problem with most introductory Nmap material isn’t inaccuracy. It’s volume. New scanners get handed thirty flags on day one and told to memorize all of them, which produces exactly the paralysis that keeps beginners from ever opening a terminal.
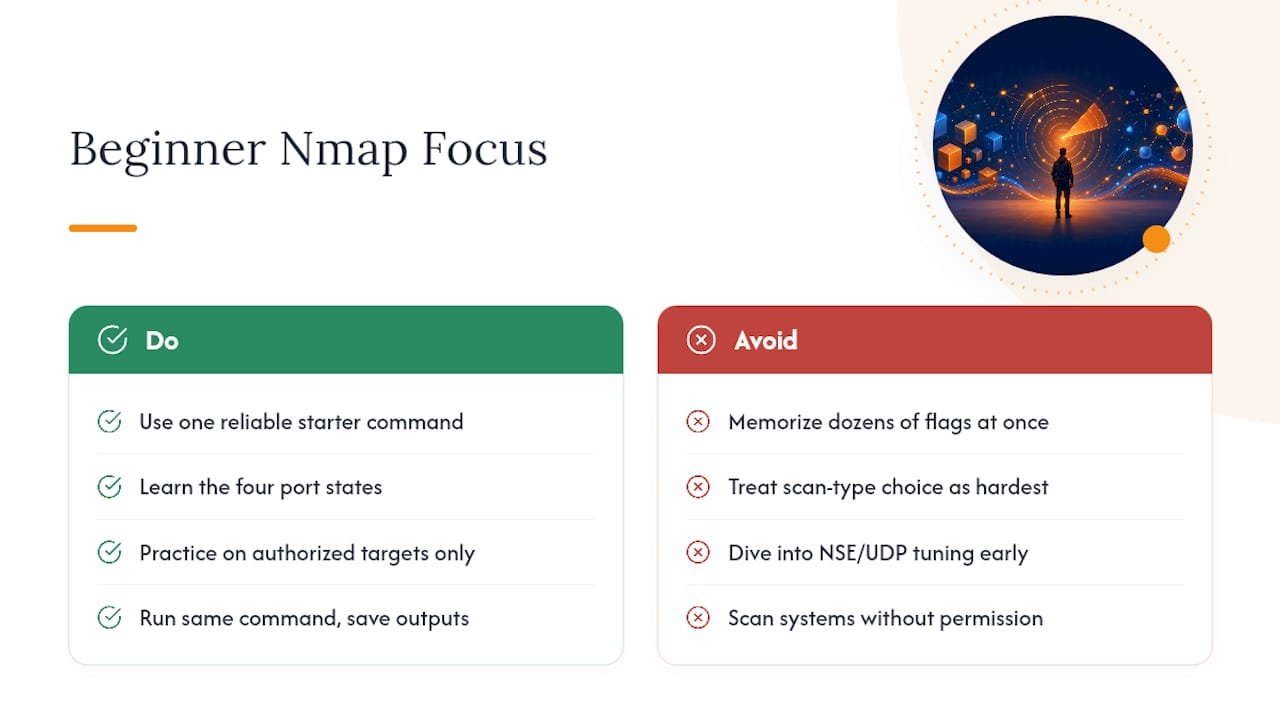
The research and documentation both point the same direction: a beginner needs one reliable command, a clear grasp of four port states, and permission to practice on a handful of safe targets. Everything else, timing templates beyond -T4, the full NSE script library, UDP scan tuning, can wait until the fundamentals are automatic. Conventional wisdom treats scan type selection as the hard part. It isn’t. Interpreting a filtered result correctly and knowing when a version fingerprint is misleading you takes more judgment than choosing between -sS and -sT.
Prioritize repetition over range. Run the same starter command against different authorized targets, save every output, and compare results side by side. That habit builds intuition faster than any list of flags ever will.
— Alden
Get Hands-On Nmap Training That Goes Beyond a Tutorial
Reading about scan flags only gets you so far. This academy is built around the gap between knowing a command and knowing what to do when its output doesn’t match what you expected.

The academy’s hands-on labs put you in front of real scanning scenarios with instructor feedback, not just a checklist of syntax to memorize. That guided structure catches the misreadings and privilege mixups that solo trial-and-error tends to leave uncorrected for weeks. Programs also fold in certification-focused exam prep, so the scanning skills you build connect directly to credentials employers recognize. If you’d rather move at your own pace, Total Cyber Academy also offers a self-paced training track covering the same ground. Either way, the starting point is the same: check out the beginner’s career guide to cybersecurity training and see which path fits where you’re starting from.
Where to Verify Nmap Commands and Syntax
- The official Nmap documentation remains the authoritative source for every flag and scan type.
- The Nmap man page breaks down port states and reference syntax in full detail.
- The Linuxize Nmap cheat sheet is a fast lookup for common commands and troubleshooting.
Bookmark all three. You’ll return to them more often than any tutorial, including this one.
Sources
FAQ
How Do I Use Nmap as a Complete Beginner?
Install Nmap, confirm it with nmap --version, then run nmap -sV -sC -T4 TARGET against an authorized practice host like scanme.nmap.org or your own local network.
Is It Legal to Use Nmap?
Nmap itself is legal software, but scanning a network without permission can violate computer misuse laws. The official Nmap documentation is explicit that authorized use only is the safe standard to follow.
What Are Some Basic Nmap Commands for Beginners?
Start with nmap TARGET for a default scan, nmap -sV -sC -T4 TARGET for version and script detection, nmap -sn TARGET for host discovery, and nmap -oA filename TARGET to save your results.
How Do I Perform a Basic Scan With Nmap?
Type nmap followed by the target’s IP address or hostname; Nmap will check the top 1,000 common TCP ports and report back which ones are open, closed, or filtered.
What’s the Difference Between a SYN Scan and a Connect Scan?
A SYN scan (-sS) requires elevated privileges and never completes the TCP handshake, making it faster and quieter in logs, while a connect scan (-sT) completes the full connection and works without special permissions.