A minimal, safe pentesting lab is a host running a hypervisor, a Kali attacker VM configured with NAT and host-only adapters, and one isolated target VM or container. We walk through this build step by step below. Start with VirtualBox, a Kali image, and a single target like Metasploitable or OWASP WebGoat, and keep every vulnerable system off your home network and the internet.
TL;DR:
- A host with at least 8 gigabytes of RAM and an SSD is recommended to run Kali and one or two target VMs smoothly, with 16 gigabytes preferred for more targets.
- Use VirtualBox with NAT for internet access and a host-only network with static IPs to keep targets isolated and consistent across sessions.
- Always assign the attacker VM adapters correctly and disable DHCP on the host-only network to prevent address changes after reboots.
- Keep vulnerable targets like Metasploitable on a host-only network, never on bridged or NAT, to avoid exposure to external networks.
- Running vulnerable web apps like OWASP WebGoat in Docker containers on isolated networks is a resource-efficient and safe alternative to full VMs.
Table of Contents
- Quick checklist and downloads to gather before you start
- Hardware and host requirements: realistic minimums and trade-offs
- Lab architecture and network isolation: the two-network topology
- Install and configure VirtualBox: create NAT and host-only networks
- Set up the Kali attacker VM: import, resources, and adapters
- Add target VMs and vulnerable apps safely
- Essential tools and quick verification commands you’ll use every session
- Safety, rules of engagement, and quick legal and ethical notes
- Practical learning tips and troubleshooting
- Why hands-on labs accelerate job readiness
- Hands-on training and programs from Total Cyber Academy
- FAQ
- Sources
Quick checklist and downloads to gather before you start
Gathering these pieces first keeps the build moving without mid-setup interruptions.
- Download VirtualBox for your host operating system.
- Grab an official prebuilt image from Kali Linux downloads rather than a third-party mirror.
- Get a Metasploitable image and the OWASP WebGoat Docker image for your vulnerable targets.
- Confirm virtualization is enabled in your BIOS or UEFI settings (VT-x on Intel, AMD-V on AMD).
- Free a substantial amount of disk space before importing anything.
- Install Docker, git, and curl ahead of time so you are not pausing mid-build to fetch them.
Hardware and host requirements: realistic minimums and trade-offs
Your host does not need to be exotic, but it does need headroom. A quad-core processor, something like an Intel Core i5 or an AMD Ryzen 5, handles a Kali VM and one or two targets running simultaneously without constant lag. Two cores can technically work, but switching between VMs becomes frustrating fast.
- RAM: 8 gigabytes can run one VM at a time; 16 gigabytes is generally recommended for running Kali plus a target; more RAM provides comfortable room for snapshots and multiple targets.
- Storage: an SSD is strongly recommended, since VM disk images are read and written constantly during scans and exploitation.
- Host OS: Windows, macOS, and Linux all run VirtualBox fine, as long as hardware virtualization support is enabled.
VirtualBox is a free, widely used hypervisor that includes the host-only and NAT networking features this lab design depends on. If your machine is older or RAM-constrained, skip full VM targets and run vulnerable apps as Docker containers instead, since containers use a fraction of the memory a full VM needs.
Lab architecture and network isolation: the two-network topology
Picture three pieces sitting on one physical host: the hypervisor itself, your Kali attacker VM, and one or more target VMs or containers. Two virtual networks connect them. The attacker VM gets a NAT network so it can reach the internet for updates and tool installs. The targets sit on a host-only network, which never touches your home router or the wider internet. This separation is the single most important design choice in the whole build, and it comes straight from how practical lab guides structure a safe topology.
- Never attach a bridged adapter to a vulnerable target; bridged mode puts it directly on your home LAN, visible to every device on it.
- Assign the host-only network a predictable subnet, such as 192.168.56.0/24, so target addresses stay consistent across sessions.
- For container-based targets, create a custom Docker network instead of using the default bridge, which keeps containers isolated from the host’s other traffic.
Pro Tip: Disable DHCP on your host-only adapter and assign static IPs to targets, so a reboot never scrambles the addresses you have already mapped.
Install and configure VirtualBox: create NAT and host-only networks
Setting up networking correctly before you import a single VM saves hours of troubleshooting later.
- Download VirtualBox from the official site and run the installer for your operating system.
- Open File, then Tools, then Network Manager, and create a new NAT network for your attacker VM’s internet access.
- In the same Network Manager window, create a host-only network and note its name, since you will reference it when configuring VM adapters.
- Set the host-only adapter’s IPv4 address, for example 192.168.56.1, and disable its DHCP server for consistent static addressing.
- Expand each VM’s advanced network adapter settings before the VM’s first boot. Skipping this step is a common cause of adapters that never initialize properly.
- Verify the host-only network exists and carries the expected IP by checking the adapter list in Network Manager before moving on.
Set up the Kali attacker VM: import, resources, and adapters
Kali is your attack platform, and getting its resources and networking right up front prevents slowdowns mid-session.
- Import the official Kali OVA from Kali Linux downloads for the fastest setup, or install from ISO if you want to customize partitioning.
- Allocate at least 4 gigabytes of RAM and 2 virtual CPUs; bump both up if your host has the headroom.
- Set Adapter 1 to the NAT Network you created, and Adapter 2 to the host-only adapter, matching its exact name.
- Boot Kali and run
apt update && apt upgrade, then install core tools withapt install nmap wireshark metasploit-framework. - Change the default credentials immediately, then shut down and take a clean snapshot before any exploitation work begins.
Kali ships as a ready-to-run image with prebuilt VirtualBox and VMware files, which removes a layer of setup compared with a from-scratch Linux install.
Add target VMs and vulnerable apps safely
Your targets are where the actual practice happens, and their isolation matters more than anything else in this build.
- Import Metasploitable and set its only network adapter to host-only. Never give it a NAT or bridged connection.
- Run OWASP WebGoat through Docker and bind it to 127.0.0.1 for local-only testing, since the project itself warns it should stay disconnected from the internet while running.
- Create a dedicated Docker network for multi-container labs so WebGoat, DVWA, and similar apps stay grouped and isolated together.
- Start with Metasploitable for broad, low-friction practice against common misconfigurations.
- Move to OWASP BWA or WebGoat for web application specific exploitation.
- Progress to a small Active Directory lab once you are comfortable, for enterprise-style scenarios.
- From Kali, confirm connectivity with a ping and an nmap scan against each target. Confirm none of them can reach the internet.
Essential tools and quick verification commands you’ll use every session
A short toolkit covers most beginner exercises: nmap for scanning, Wireshark for packet capture, Metasploit Framework for exploitation, OWASP ZAP or Burp Suite for web testing, and net-tools for basic networking diagnostics.
- Check your adapters with
ip addr showbefore anything else. - Confirm a target is reachable with
ping -c 4 <target>. - Fingerprint services with
nmap -sV <target>. - Test a web app directly with
curl http://<target>:80.
Snapshotting your VMs before destructive tests lets you revert instantly instead of rebuilding from scratch, a practice that lab writeups consistently point to as the fastest way to recover from a broken exploit attempt. Save PCAPs and screenshots as you go, since they form the backbone of any lab writeup or portfolio piece.
Safety, rules of engagement, and quick legal and ethical notes
A few rules protect you and everyone around you on the network.
- Never expose Metasploitable, WebGoat, or any intentionally vulnerable target to the internet or your home LAN.
- Get written permission before testing any system you do not own; unauthorized testing is illegal regardless of intent.
- If you suspect your host itself has been compromised, disconnect it and restore from a clean snapshot or backup immediately.
- Laws and employer policies vary by jurisdiction and organization, so this guide is educational and does not replace local legal guidance.
These principles echo the discovery and validation phases laid out in NIST’s assessment methodology, which frames penetration testing as a structured, permission-based process rather than open-ended probing.
Practical learning tips and troubleshooting
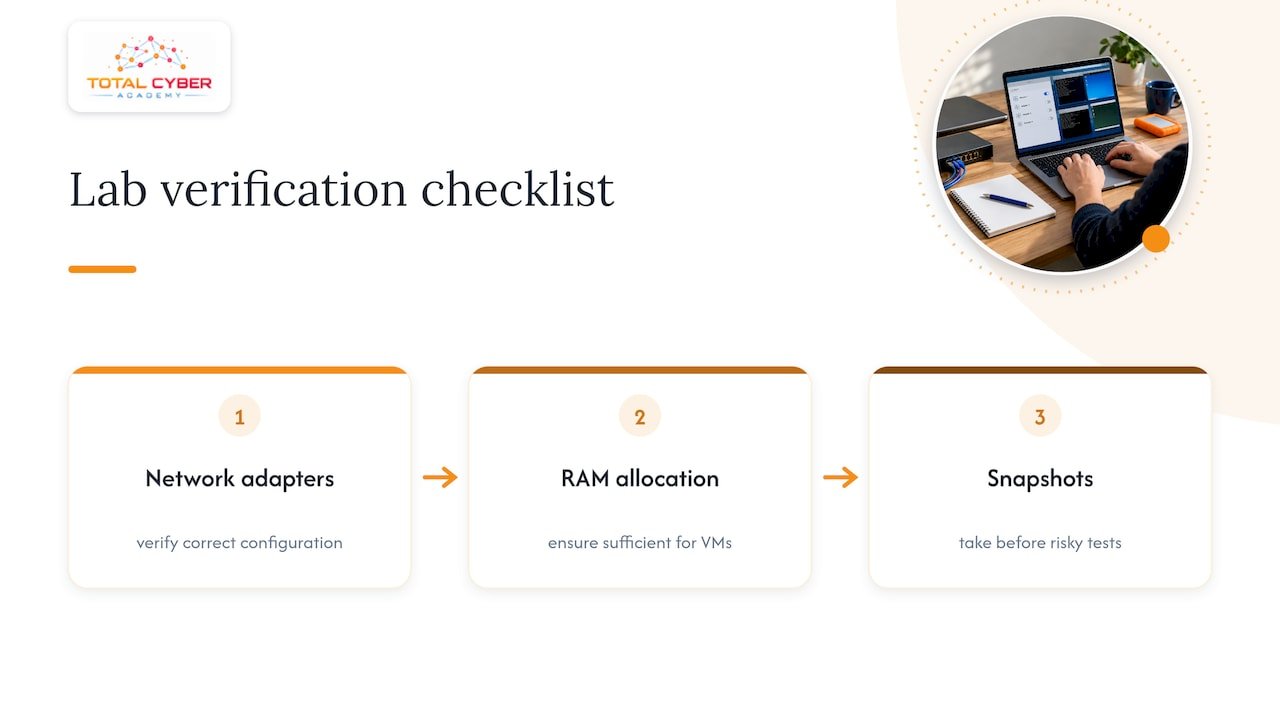
We built role-based lab paths around exactly this kind of steady, repeatable practice. The pitfalls we see most often are misconfigured adapters, underpowered RAM allocations, and skipping snapshots before risky tests. Pairing structured lab sequences with the fundamentals here, including certification pathways, turns scattered practice into measurable progress.
Why hands-on labs accelerate job readiness
Lab practice like this maps directly onto the tasks hiring managers test for in interview labs and practical assessments. Candidates who can explain their network topology and walk through a scan methodically tend to stand out more than those who only know exam terminology.
— Alden
Hands-on training and programs from Total Cyber Academy
Building this lab teaches you the mechanics. Turning that practice into a career usually means pairing it with structured instruction, mentorship, and certification preparation.
Our Penetration Tester Program builds on exactly the skills covered here, with guided labs and live mentoring from working cybersecurity professionals. For readers who prefer self-paced study, our on-demand courses cover certification prep alongside practical lab work.
- Mentorship from active cybersecurity professionals, not just recorded lectures.
- Labs and exam prep built around the same tools you just installed, including nmap and Metasploit.
- Flexible formats for career changers and veterans balancing study with other commitments.
Browse our programs page to see which track fits your next step.
FAQ
What is the minimum setup for a pentesting lab?
A working minimum is a host machine, VirtualBox as the hypervisor, a Kali attacker VM, and one isolated target like Metasploitable running on a host-only network. This configuration lets you practice scanning and exploitation without any internet exposure.
Is VirtualBox or VMware better for a home lab?
Both support the NAT and host-only networking a safe lab needs, and either works for beginners. VirtualBox is free and widely documented, which makes it the more common starting point for home labs.
Can I run a pentesting lab with Docker instead of full VMs?
Yes, many vulnerable web applications like OWASP WebGoat run well in Docker containers, using far less RAM than a full VM. Keep containers on a custom Docker network isolated from your host’s other traffic and bind ports to 127.0.0.1 for local-only access, as the WebGoat project itself recommends.
How much RAM do I need for a virtual pentest lab?
Sixteen gigabytes is a practical minimum for running Kali alongside one target simultaneously. Eight gigabytes can work if you run one VM at a time, more RAM provides comfortable room for snapshots and multiple targets.
Is it legal to practice penetration testing at home?
Testing systems you own and control on an isolated lab network is legal and is how most practitioners build skills. Testing any system you do not own without written permission is illegal, regardless of your intent.
Sources
- NIST Special Publication: Information Security Assessment Methodology
- How to Build a Penetration Testing Lab: The 2025 Home Guide – BroadChannel
- OWASP WebGoat | OWASP Foundation
- VirtualBox Downloads
- Kali Linux downloads